
How to set up a hand telegraph key: old-school master tips
For many radio amateurs, the hand telegraph key (the telegraph manipulator, affectionately called a „pedestrian“ key or „hammer“) is a symbol of true radio amateurism. But to make broadcasting a pleasure, not a wrist torture, the key must be precisely tuned.
In this short guide, I have gathered the experience of generations of professional radio telegraphers and radio amateurs to help you find your ideal balance.
The roots of craftsmanship: the old school
Before we move on to the technical details, I would like to mention the people from whom I „stole“ the craft half a century ago and more in Veliko Tarnovo. These are men for whom telegraphy was not just a profession, but an art and a calling. The craftsmanship was passed down to me by the strict but fair officers Colonel Ovcharov and Colonel Kokalov in the radio club, and later in the military school and Colonel Rakov. In amateur radio, my mentor and teacher was Pop Stefan (LZ2PS), at that time LZ2F166 (hence my call sign is LZ2F266). These teachers didn’t just show us how to transmit and turn the screws on the key, they taught us the „music“ of radiotelegraphy, respect for the correct sign. This article is a small bow to their contribution and recognition of their care, which grew into endless respect and lifelong friendship.
The „love“ of the hand key is a diagnosis that is not cured, but only passed on to the next generations. It is something intimate. The rhythm of the correct key is like meditation – a feeling that no automaton can replace.
A poorly tuned key is like an out-of-tune violin – no matter how hard you try, the melody is lame, and your hand seizes up in 10 minutes of work.
Here is my “philosophy” for tuning the classical treble clef, conveyed as text.
1. Preparation: stability and position
Before turning the screws, take care of the base. The key should be firmly fixed on a heavy pad or directly to the table.
The golden rule for posture:
- The elbow should be at table level.
- The wrist should be off the edge of the table (in the air) so that it can move freely. The hand should be a natural extension of the key.
- Visualization: Imagine that the contact is not in the key itself, but just below the crease of your wrist. Try to mentally „contact“ there, with this joint, which without a signal is slightly raised, and with dashes and dots it goes below the level of the base of the key.
2. The side bearings: eliminating the backlash
First of all, pay attention to the side screws.
- Loosen them as much as possible until the arm starts to click noticeably.
- Start tightening them carefully until the lateral movement disappears completely, but no more. The arm should move freely only up and down, without any movement left and right.
- Caution: Stop right at this point! If you overtighten, the up and down movement will become „wooden“ and heavy, and the spring will not do its job properly.
If the key has lateral play, it „dances“ under your fingers and the focus is lost. You feel it as foreign and unruly.
3. The distance between the contacts: the „A4“ method
Here is the great secret of speed and a clean sign. Too much distance leads to jostling, and too little – to sticking of the signs.
- For beginners: start with a larger stroke (about 0.6 mm) to “loosen” the wrist.
- For advanced users: the gold standard is 0.15 – 0.3 mm.
The A4 sheet trick: Take a regular printer sheet (A4, 80 g). Fold a strip along the narrow side 4 times (to make four layers – this is about 0.6 mm). Place it between the contacts and adjust so that you pull it with force. As you progress in your training, reduce the folds to 1 or 2 layers (this is about 0.15 – 0.3 mm).
Many beginners make the mistake of leaving an extremely large stroke, thinking that this way they transmit more accurately. About a millimeter. Big mistake! Such a stroke leads to a “bump”, which tires the wrist and spoils the rhythm.
4. Spring tension: the weight of the hand
The spring should not “stretch” and fight with your hand. It only serves to return the key to its original position.
- Adjustment: Loosen the spring as much as possible. Start tightening it very slightly until you feel that it can withstand the weight of your hand (with a relaxed hand, without resting your wrist on the table). It should not allow the contacts to close. The key should be “soft”, but firmly open when at rest. The spring should be just enough tension to reliably return the lever up without „kicking“ you back.
- When the spring is too tight, you will feel as if your hand is starting to work „from the shoulder“, and this should not happen – it should only work from the wrist.
5. Conclusion and advice from the old school
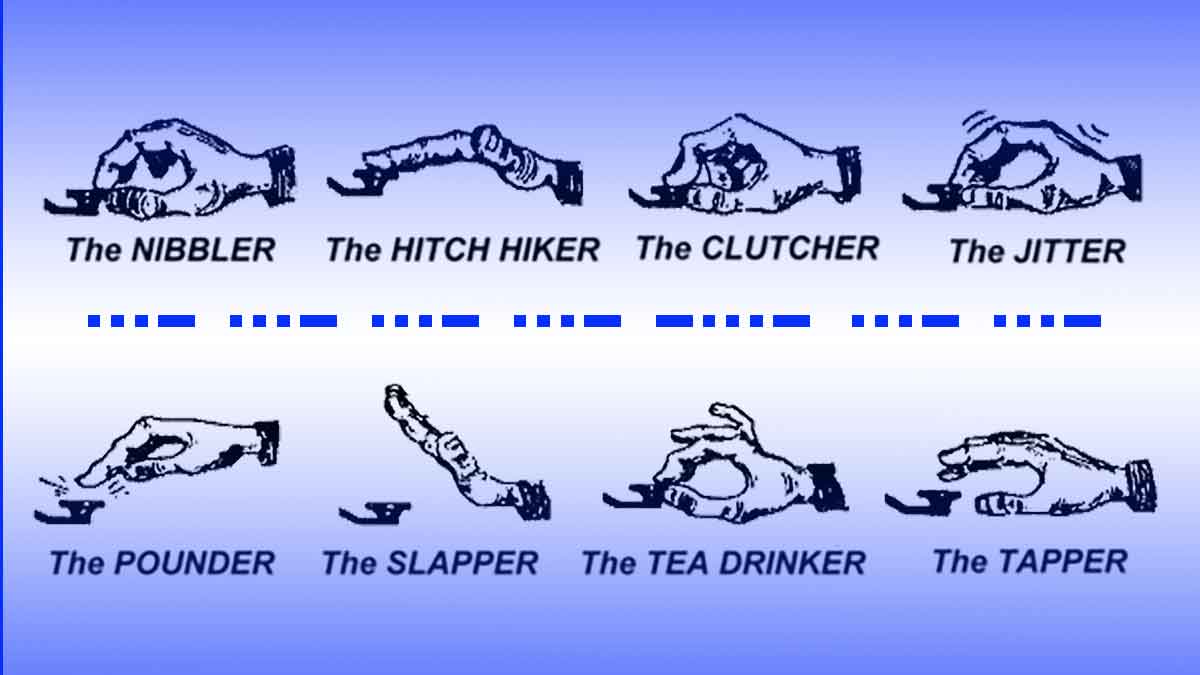
Handling with a manual key is not a job with your fingers, but a „swing“ of the entire wrist. Your fingers only surround the knob, without squeezing it. With your index and middle fingers, you press down, and your thumb and ring finger support the ball of the key as it moves up. The swings are made with your wrist, not your fingers! When you achieve the correct setting, you will feel how the key „sings“ along with you, you will feel it as an integral part of your hand.
My “secret” tip: posture and attitude
Don’t adjust the switch while holding it in your lap. It should be firmly attached to a heavy base (a marble slab, a thick metal base, or directly to the table). Your elbow should be at the level of the table, and your wrist should be slightly raised, as if you were holding a tennis ball.
Feel the switch! Love it! It will pay off and you will be proud that you master the “craft” that only selected people are dedicated to.
Do you have your own specific trick for adjusting the manual switch? Who were your mentors and teachers? Share it in the comments, this will be your personal contribution and motivation for young radio amateurs or those who want to become one.

