
Firmware Update of FTDX-10
That sounds scary, but it’s not. Or at least it’s not until something goes wrong – like cutting out your electricity at that very moment. But let’s not be pessimistic…
If everything is in order and you follow the procedure, nothing bad should happen. Updating the firmware is an important and useful thing to do with every update, especially if you find any issues.
And let me say it again: don’t turn off the radio during a firmware update! There must be some solution if you do that, but I don’t want to understand what it is.
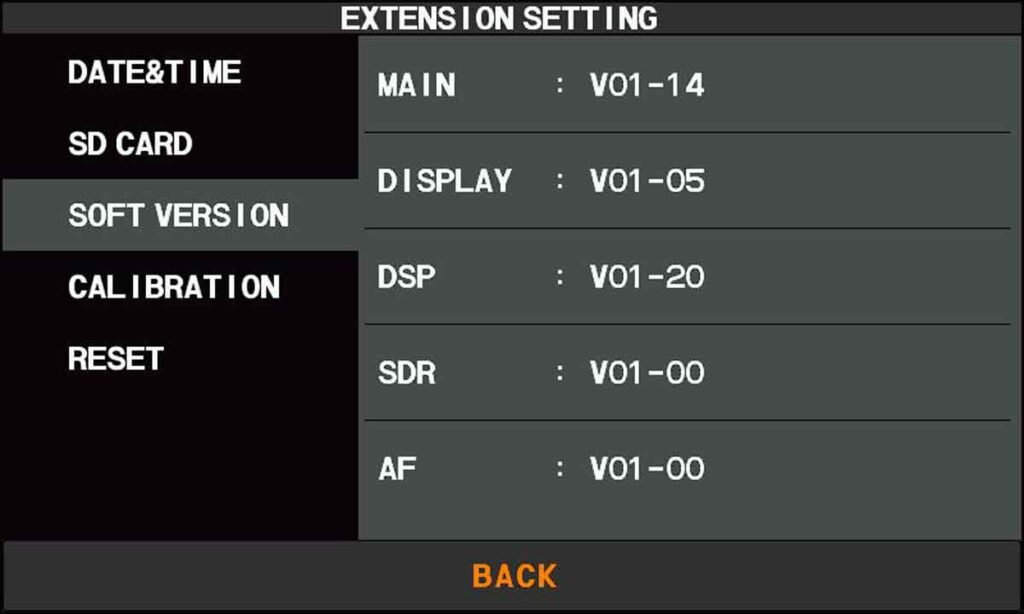
1. The first step is to check your current firmware version.
This is important because it may not need to be updated. You can see this with
<FUNC> <EXTENSION SETTING> <SOFT VERSION>
The screenshot shows my current versions as of 02-12-2024.
2. The second step is to check the firmware versions on Yaesu’s site and if there is one newer than yours, download it.
Yaesu’s website is at http://www.yaesu.com.
Find the FTDX10 section under products or by clicking the FTDX10 image on the banner. Select the “FILES” tab. Look in the “AMATEUR RADIO \ SOFTWARE” tab for the “FTDX10_Firmware_Update_Information” file. Open the file and compare the firmware version numbers with the ones currently installed on your radio.
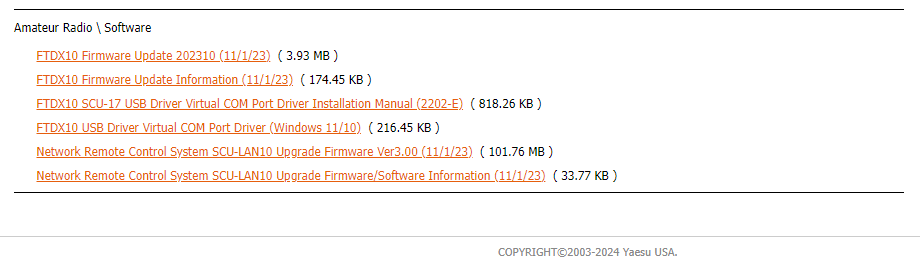
If any of the versions are newer than the one currently installed on your radio, you will need to download the new firmware.
If there isn’t a newer version, crack open a beer and make a few new connections – you don’t need to update anything.
The archive you need to download is named “FTDX10_Firmware_Update_[revision (date))“.
Unzip it. Save the files directly to the FTDX10 directory on the SD card. Do not save them in a subdirectory. If you don’t have the SD card for the transceiver, buy one. It doesn’t have to be big, 4GB will do a wonderful job for everything. The largest that works with the FTDX-10 is 32 GB.
3. You can skip the next third step, but it usually saves a lot of time and nerves, so – do it!
Save the current menu settings and memory channels to the SD card.
It goes like this:
<FUNC> <EXTENSION SETTING> <SD CARD> <MENU SAVE DONE> <NEW> <ENT>

Tap the File Saved icon when recording is complete.

<FUNC> <EXTENSION SETTING> <SD CARD> <MEM LIST SAVE DONE> <NEW> <ENT>

Tap the File Saved icon when recording is complete.
4. The fourth step is the FTDX-10 firmware update itself.
Take a deep breath and let’s act:
<FUNC> <EXTENSION SETTING> <SD CARD> <FIRMWARE UPDATE DONE>
The radio software will automatically select updates that are newer than the radio firmware. There’s no point in marking the ones that aren’t selected either, unless you have a radio failure and you’re sure you need to. If the downloaded archive does not contain an update for one of the processors, you will see the text “(No such file).”
Tap UPDATE, then OK.
DO NOT TURN OFF THE RADIO DURING A FIRMWARE UPDATE!
If you are a believer, you can cross yourself three times so that the current does not stop.
Once the new firmware is installed, the radio will reboot to load the changed files into the various DSP, FPGA and CPU devices.
If an error message is displayed during the firmware update, for example, has a corrupted file been detected?
Don’t panic!
Touch the screen and the radio will automatically reboot to the old firmware. Then downloaded a fresh copy of the firmware from Yaesu and repeated the process carefully again.
5. Fifth step – restore settings and memory.
If you want, you can restore the settings saved on the SD card. Or you can make them again for educational purposes.

